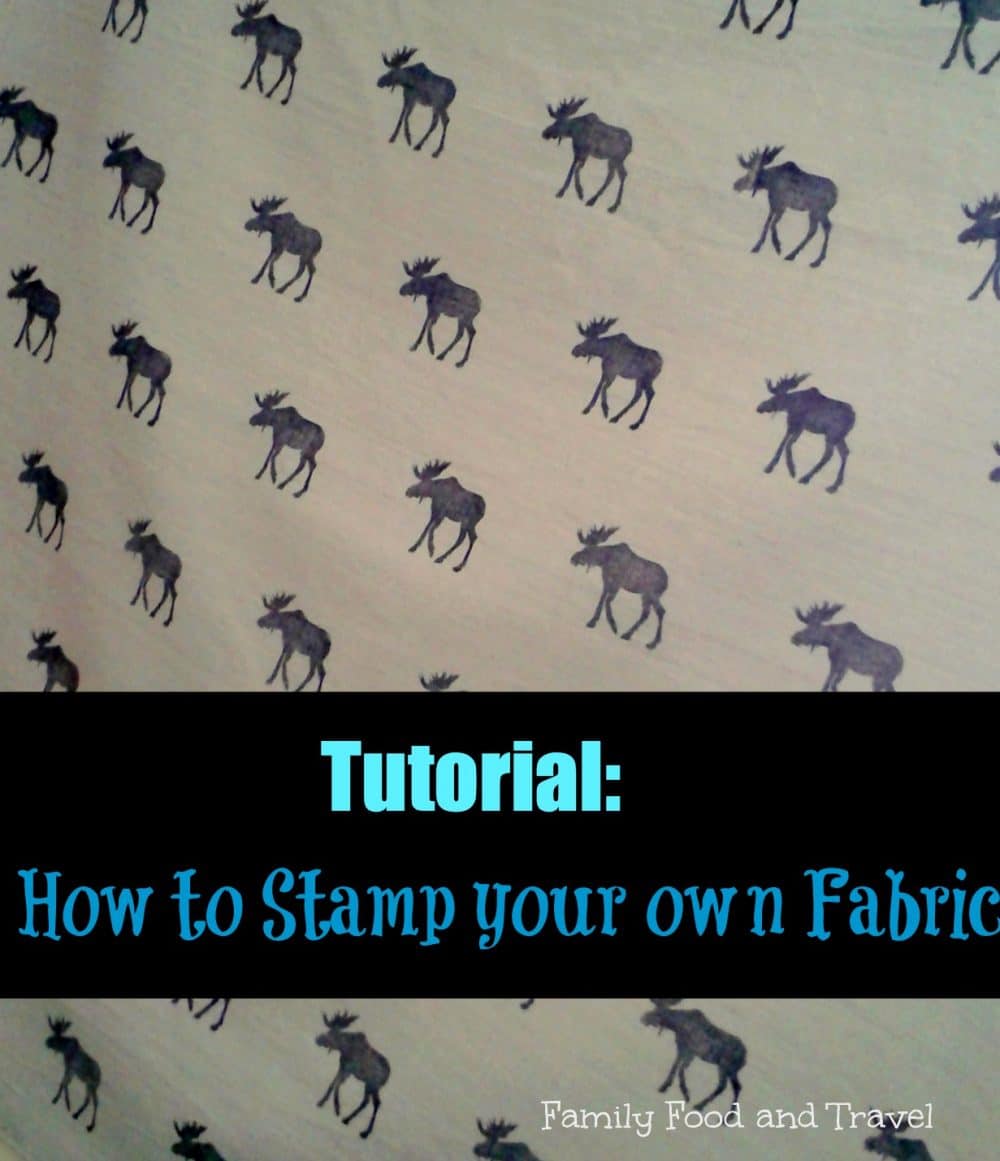
This tutorial on DIY Fabric Stamping is designed to help you make one-of-a-kind hand stamped fabric pieces that can be transformed into a wide variety of household items, decor and clothing. While it takes some time, the result is truly stunning.
DIY Fabric Stamping Materials
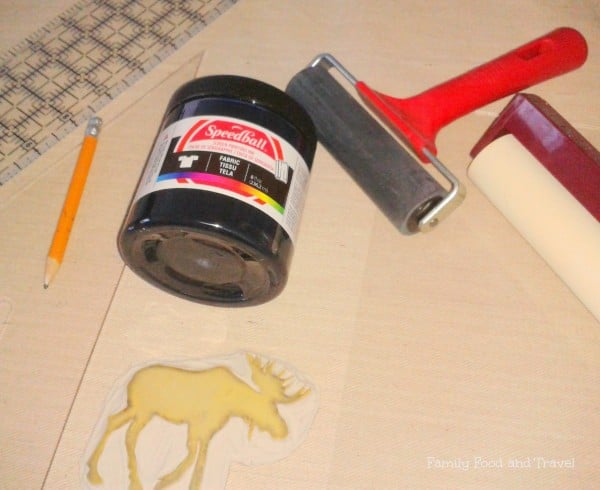
- A stamp or lino cut – large, simple shapes will work best
- One or two yards of light coloured fabric – cotton, linen, or wool
- Water-based fabric ink
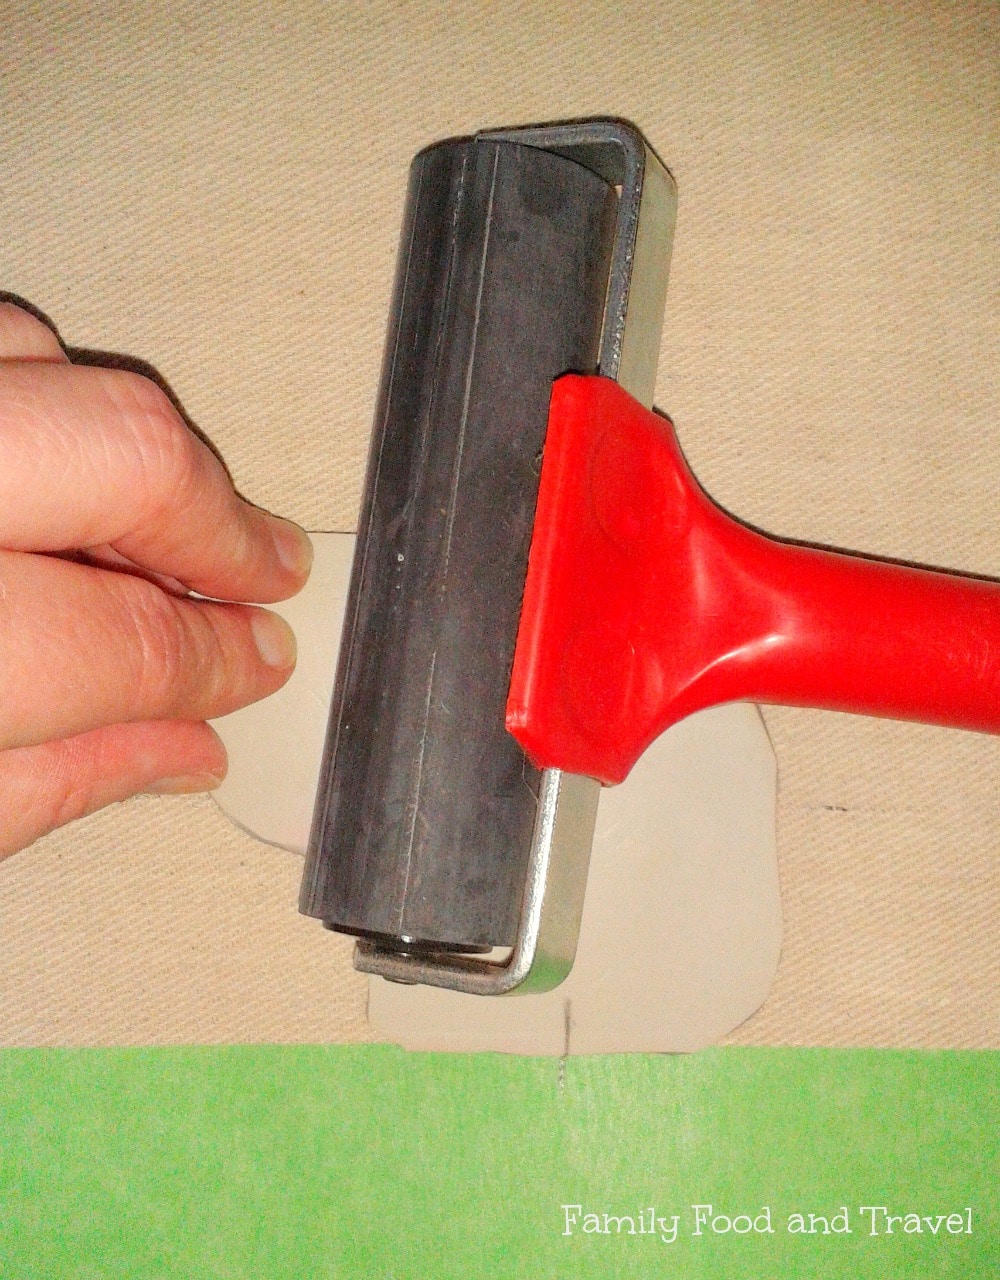
- Brayers – one soft for rolling ink and one hard for pressing the stamp. (If you don’t have a brayer you can use a paint brush or foam brush to apply the ink to the stamp)
- A piece of glass for rolling out the ink – I used the glass from an old picture frame
- Painter’s tape
- Ruler
- Pencil
- Scrap paper or drop cloth to protect your work surface
 Getting Started
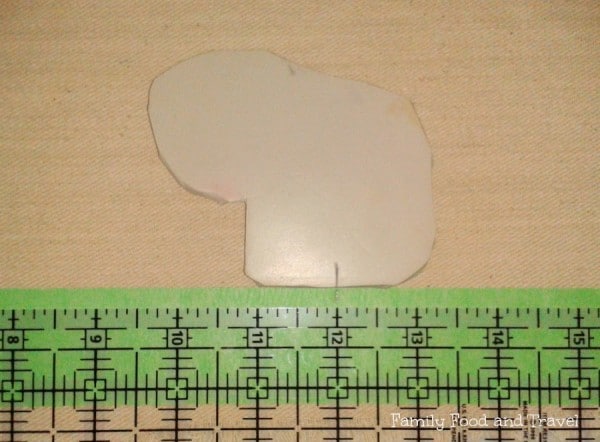
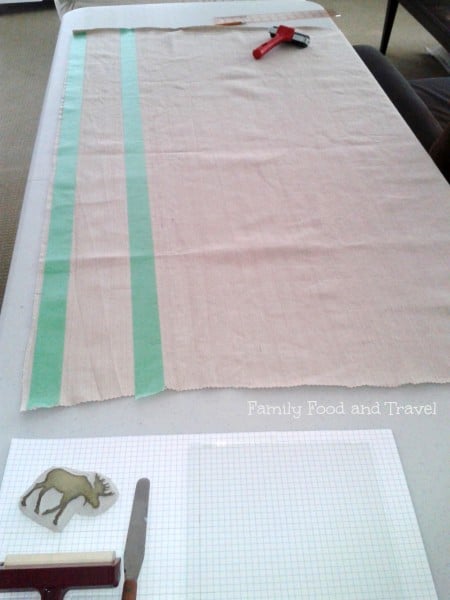
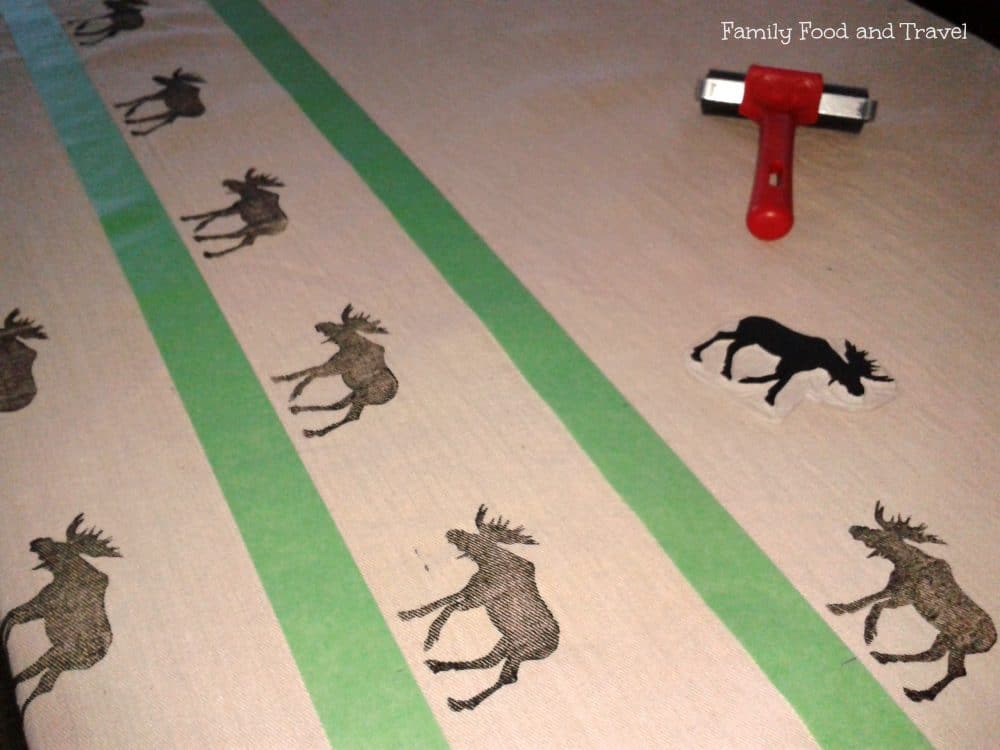
I decided to create a simple, linear repeating pattern using a Moose linocut I made a few years ago. The first step is to lay out a strip of painter’s tape on the fabric. Place the stamp face down on the fabric, lining up the bottom edge of the stamp with the top edge of the tape. Make a pencil mark on both the stamp and tape. These are known as registration marks.
Now you can decide how far apart you will place each stamped image. I chose to separate each stamp by 6 inches. Measuring from the first pencil mark on the tape put a registration mark at 6 inch intervals all the way across. You should also now decide how far apart the stamped rows will be. To keep things simple I measured 6 inches above the first piece of tape, placed a second one, and then continued to lay out rows of tape 6 inches apart on the remaining fabric. To create a staggered pattern the registration marks on rows 2, 4, 6, etc should be centered between the marks on rows 1, 3, 5, etc.
 Stamping
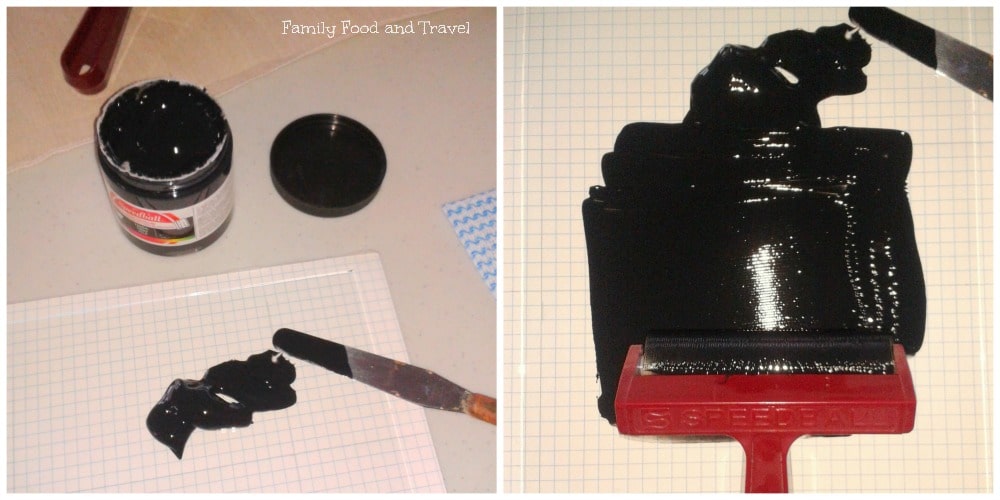
Scoop a small amount of ink onto the piece of glass. A little goes a long way, so don’t use too much! Roll the soft brayer into the ink then draw it back towards the bottom of the glass and then back up towards the top. Rolling the brayer back and forth will spread the ink in an even layer across its surface. You can also turn the brayer 90 degrees and roll it a few times across the ink area to help get an even spread. Listen for a sticky “squelch” sound – that’s the indicator that you have the right amount of ink on the brayer! (If you don’t hear the squelch you may have too much ink on the brayer)
Continue to stamp your image, re-inking each time, until the entire piece of fabric is stamped. Allow the ink to dry before ironing the wrong side of the fabric to help “heat set” the ink. Now you can start to plan all the wonderful things to make with this fabric!
Kate Carder-Thompson is an artist, designer, and embroidery enthusiast. She is currently working on a series of art making experiments in which iconic patterns from disparate cultures, geographic areas, and time periods are forcibly intersected and stitched together. Kate blogs at Haliblurtin and lives in a small cottage in Haliburton, Ontario with her husband and their menagerie of pets.

That is wicked cool! I had no idea you could even do something like that, but it’s awesome!
Robin (Masshole Mommy) recently posted..April School Vacation Week at Blue Man Group (April 21 – 24)
This is so pretty! I can think of a million fun things that I could make from that fabric too!
Jennifer B recently posted..Unquenchable by Tawdra Kandle
This Is Pretty Cool I Always Thought Doing This Would Be Hard!! Thank You!
Lisa Jones recently posted..Walgreens Match Ups 4/6!
I used to be a silk screener when I was younger, and have the appreciation for fabric design. I love this idea, and admit I have never thought to do it!
Amy Desrosiers recently posted..5 Easy Spring Cleaning Tips
Wow! Your fabric came out really awesome. I had no idea it was so easy.
Tracie recently posted..Get Involved In Sexual Assault Awareness And Child Abuse Prevention Month – April 2014
Very cool! It looks like something even a non-crafty person like me could do!
Christine Luken recently posted..How to Save Money on Your Children’s Easter Clothes
What a great tutorial. That is awesome.
Debbie Denny recently posted..Stepping Back In Time to Civil War Days at Har-Ber Village!
I always wondered how people did that. Thanks for the tutorial!
Rebekah recently posted..Zaytinya to Celebrate 6th Annual Greek Easter Festival
I would love to do this with my son. He would have a blast.
this is giving me all kinds of fun crafty ideas
Totally love the moose!
I love how easy this looks to make.
Knowing me I would end up with a ton of fingerprints…. LOL!!
I love this idea, super crafty!
That is the cutest thing ever! I love moose(s?!) and would find so many ways to use this!
Lois Alter Mark recently posted..damn you, kia!
I agree! so many great applications for this tutorial
That is really cool. It hadn’t really occurred to me that you can buy the materials to do stuff like that.
J.Merrill recently posted..Announcing Our Nutrisystem “Couples Challenge” With MomStart!
I love the look of the stamped fabric. Thanks for the tutorial.
Pam recently posted..A Grumpy Cat Birthday Party & Giveaway
This is so cool. It looks like something I could do too.
Jessica Lieb (@bkeepsushonest) recently posted..Elevation Burger Raleigh, NC – Review
What a great idea. Your stamps turned out great. I would love to do this on some material in my boys room. Thanks for the idea. :)
Deanna Ritz recently posted..Chicken Chimichangas with a Green Chili Sour Cream Sauce
Oh my gosh! This is awesome. I want to spend a good portion of my summer forcing myself to get crafty and make some of my own clothes. This will be such a useful tool for adding funky patterns to my looks. – Katy
KatyRose recently posted..Family Traditions – Songs, Movies, Shots and Cigars
so many creative things you can do with them!
I love the way yours came out! Thanks for the tutorial!
Trisha recently posted..Little Tikes Hide & Seek Climber #SummerDreams Outdoor Fun #Sweepstakes!
I’ve never done this, but have pressed designs into velvet.
Robin Gagnon recently posted..Mango Lemonade Recipe
Fab! I love the moose print! I must try this soon! Coming over from pintorials. Lou
Lou recently posted..DIY Fabric tape (you know, like washi tape)
That looks great, one way to guarantee no-one else will have the same as you. I have ideas flying around my head at the moment :-)
Hellie’s Corner recently posted..The Great Bristish Sewing Bee ~ It’s the Final!!
That is pretty neat! I did something similar for our Disney shirts!
Awesome! You could really make so many fun and personal fabrics for your house or for gifts! Thanks for sharing!
Amanda recently posted..Making Easter “Eggstra” Special with Hallmark Easter Cards & Simple Easter Crafts
Beautiful! It’s so precise! This gives me an idea for hand towels…
This is really clear and a fantastic how-to.
Thanks for sharing at #Pintorials! :)
Gude @HodgePodgeCraft recently posted..Spring activities for kids (Tuesday Tutorials)
I’d be so nervous while I did this, but it’s awesome! You did a great job!
Liz Mays recently posted..The Bones of It #ViactivYoursAndHers
This is a fantastic idea, and I have just the perfect calico for it in my craft cupboard!
Maria @ Feisty Tapas recently posted..Little gem lettuce with anchovies / Cogollos de lechuga con anchoas
I like the idea of stamping fabric and making designs. It is good to learn how easy it is to make my own stamps.
Janeane Davis recently posted..Take Action Now and Feel Fantastic About It
Oh wow! This is really neat! I’d love to be able to be creative with my designs like this!
Love, love, love this :) I’ve got some speedball paints knocking around from screen printing, will have to give it a go #pintorials
Kate Williams recently posted..Easter Chick Craft Ideas: Tuesday Tutorials
I love this! This could work for tshirts and stuff like that-so fun!
Tess recently posted..Do you know about Argan Oil?
You make this look so easy. I don’t have much of a craft-thumb so I manage to fumble everything. But this technique would be great to personalize fabric for any kind of project!
Nicole Brady recently posted..When a Sale Costs You More
Are you able to wash and dry the material normal? I am thinking about trying this on some white baby sheets :)
Jenna – as long as you use fabric ink the it would be totally fine to wash and dry normally! Thanks for asking :)